Wednesday, September 20, 2023

appvlp problem - cannot open Excel Document with double click


Symptom: Cannot open Excel file with double click.  It opens Excel program only without opening the related file.

The problem is originated on Office Update on 19 September 2023 (build 15.0.5589.1001).

Here is my way to fix it.

1. Disable the Office Update (Prevent update again after you uninstall later)

File >> Account >> Update Options >> Disable Updates 


2. Open an elevated command prompt (run cmd.exe as administrator)

3. Change to the Office 2013 click-to-run base folder:
cd "%programfiles%\Microsoft Office 15\ClientX64"

4. Revert to version 15.0.5571.1000, which does not have this bug:
officec2rclient.exe /update user updatetoversion=15.0.5571.1000


That's it.

The above solution comes from here


Thursday, August 4, 2022

How to List all Active Sessions in Oracle and Kill it


The following SQL lists all Active Sessions.  It is useful to locate performance problem.  It shows every running SQL statement prefix.  You can also get the kill statement, just copy and run it to kill the problem session.

with vs as (select a.sid, a.serial#, a.status, a.username, a.last_call_et, a.command, a.machine, a.osuser, a.module, a.action, a.resource_consumer_group, a.client_info, a.client_identifier, a.type, a.terminal,

                        a.sql_address, a.sql_hash_value, b.sqltext

                     from gv$session a left join (select address, hash_value, listagg(trim(sql_text),'') within group (order by piece) sqltext

                                                            from V$SQLtext_with_newlines

                                                            where piece < 20

                                                            group by address,hash_value) b on a.sql_address = b.address and a.sql_hash_value = b.hash_value

 select vs.sid ,vs.serial# serial, --vs.sql_id,

        vs.username,

        case when vs.status = 'ACTIVE' 

                  then last_call_et 

             else null end SECONDS_IN_WAIT,

        (select name from AUDIT_ACTIONS where action = vs.command) COMMAND,

        vs.machine ,

        vs.osuser , 

        lower(vs.status) STATUS,

        vs.module,

        vs.action,

        vs.resource_consumer_group,

        vs.client_info,

        vs.client_identifier,

        vs.sqltext sqlprefix,

        'ALTER SYSTEM KILL SESSION '''||vs.sid||','||vs.serial#||''' immediate;' kill_statement

   from vs 

  where vs.USERNAME is not null

    and nvl(vs.osuser,'x') <> 'SYSTEM'

    and vs.type <> 'BACKGROUND'

    and lower(vs.status) not in ('inactive')

;


The following list some useful columns as an example.


Thursday, June 23, 2022

Quick Setup ownCloud and OnlyOffice on Synology in 15 minutes.

Here I am trying to setup a simpliest ownCloud server with office document editing features on Synology NAS. 

1. download ownCloud and OnlyOffice docker images


2. Launch them after download complete


3. Configure the detail of Container

 
For ownCloud

Set it to a Fixed Local Port Number


For OnlyOffice


Set it to a Fixed Local Port Number


4. Setup Reverse Proxy for HTTPS connections

Create the following Reverse Proxy


5. Switch On both Containers


Note that the OnlyOffice takes some minutes for the first run.  

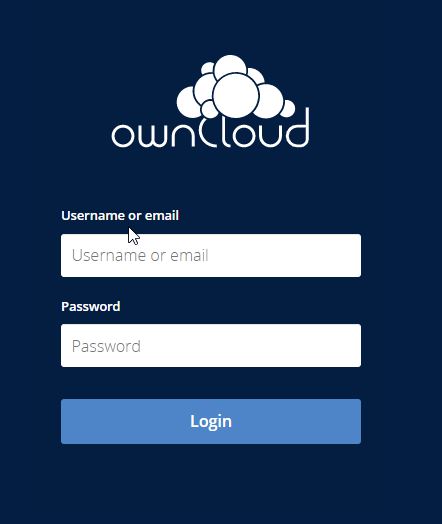
6. Now you can access your ownCloud by https://xxxxxx.synology.me:9086 
   
    Login with admin/admin and Change your password


Install OnlyOffice Plugin


Browse and Install the OnlyOffice


Configure OnlyOffice Plugin

 Locate the Settings at Settings-> Admin->Additional
    and input the correct URL


If everything ok, you will see this.  and you can further configure OnlyOffice.


Bingo!  you should now able to create online office documents. 


Or you can drag and drop some office documents to your folder and open it for a test


Actually, it will be similarly simple for non Synology setup.  But need some more skills for docker and SSL setup.  If have time, will try to demo one on CentOS or Ubuntu soon later.

Enjoy it!!!


Tuesday, June 21, 2022

Speed Up Synology Hyper Backup

Hyper Backup can only be run sequentially event you have overlapping backup schedules.  Therefore the speed is very important especially we are talking TBs data size.  

Speed Up Hints

1. Establish an Isolated LAN for backup purpose.
Most of the NAS/Servers comes with multiple Network Interfaces which facilitates for setup a dedicated Subnet for backup purposes.  You can choose 1Gbps / 2.5Gbps / 10Gbps depending on your environment and budget.  For my case, I have two dedicated for backup purpose.


2. Switch off the "Transfer encryption"
Encryption is the one of the Key of speed depending on your server computing capability.  You can experience a dramatically speed up for this setting.  For security, it's highly recommended you have a dedicated backup LAN which should not be reachable for normal machines.  Also add some firewall policies can strengthen this issue. 


3. USB Backup (Good for Keeping Offline Backup)
For protection from Ransomware attacks, Offline Backup is critical.  USB external device is a choice.  All Synology NAS come with some USB ports.  In my case, I have 4 USB 3.0 ports.  I connected three external HDDs for keeping offline backup.  Make sure you have a USB 3 connection devices over a Quality USB cable.  Theoretically, USB 3 supports up to 5Gbps.  However from my experience, I only got around 0.8Gbps  (around 90MB/s) with disabling transfer encryption.  For a 1TB backup, it takes around 4 hours in my case.  But this is talking about the first backup set.  For consequent incremental backup sets, it would be much faster without significant changes.

4. Backup Set (Split to Smaller Ones)
For first backup set, it always takes days or event weeks to complete.  It's painful for waiting for its completion.  If there is an incidence or interruption, the backup would be unusable.  So, DON'T CREATE A BACKUP JOB TOO BIG.  Split it to some smaller jobs.  From my case,  for large file with few file count, keep them under 1TB.  For numerous files with smaller size, keep them under hundered GB.  Anyway, try to tune the backup set in a proper size.  Or consider to add the size progressively. 

Enjoy!!!


Wednesday, September 16, 2020

Guacamole Tips for connecting Windows 10 or Newer Windows Versions

You might encounter problem on connecting newer version of Windows systems like Windows 10.  Here are some notes for overcome general problem

1. Authentication Settings (Normal , Windows 10 needs to provide user password for remote login because of  Network Level Authentication NLA only enabled) 


To disable the NLA, you need to set this off under Settings -> System -> Remote Desktop->Advance Settings.

another way is 


2. Performance Settings (from my testing, I need to Disable bitmap caching, otherwise, it does not work, you can ignore this point if it works with this)


How to upgrade your Synology RAID drives to bigger size

Note that, this procedures is applicable for size upgrade (not down size!!!)


 I have a Synology DS214play running with two 2TB HDD.  Now I need to upgrade them to 6TB.  The steps are very simple.  

*** (the following figures are captured after upgrade, so ignore the HDD size concerned)

1. Go to Storage Manager ->Volume and make sure it is Healthy (not repairing/degraded!!!)


(before upgrade the my Total Capacity was 1.81 TB)

2. Go to Storage Manager -> HDD/SDD and make sure they are Healthy


(before upgrade both drive capacity were 1.81 TB)

 3. Identify which is physically Drive 1 on your NAS.


Then you can see your Drive 1 LED color becomes Orange

4. Select Drive 1 and Action -> Deactivate (you need to input admin password to do so)


5. Unplug the Drive 1. (make sure it is the correct drive located in step 3).  You will hear beep for RAID degraded notification.

6. Replace Drive 1 with a 6TB HDD and plug it back to the bay.

7. Go to Storage Manager->Storage Pool -> Action -> Repair


 Then Click Apply on next screen.


 And you will see something like this.


(during repairing of Drive 1,  you will see Drive 1 becomes  5.46TB and Drive 2 is still 1.81 TB)

After a while, it will start the synchronization.  (It takes hours or even days to complete depending on your data size)


 After hours repairing, the volume status will back to Healthy.

(after repairing of Drive 1,  you will see Total Capacity still being 1.81 TB)

8. You can repeat step 1 to 7 for Drive 2 (BEFORE THIS, MAKE SURE YOUR Volume status is Healthy!!!

After repairing of Drive 2 completion,  you will see Total Capacity growing to 5.43 TB)